
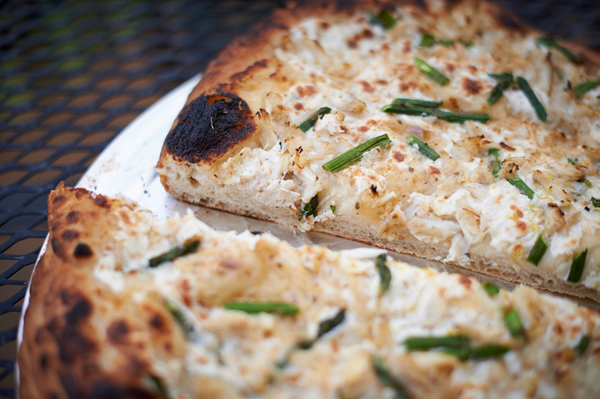
My first wood-fired pizza experience was at Dogfish Head’s old brewpub in Rehoboth Beach. I remember it as being absolute perfection. That savory crab-and-asparagus pizza with a creamy white sauce forever skewed my pizza experience.
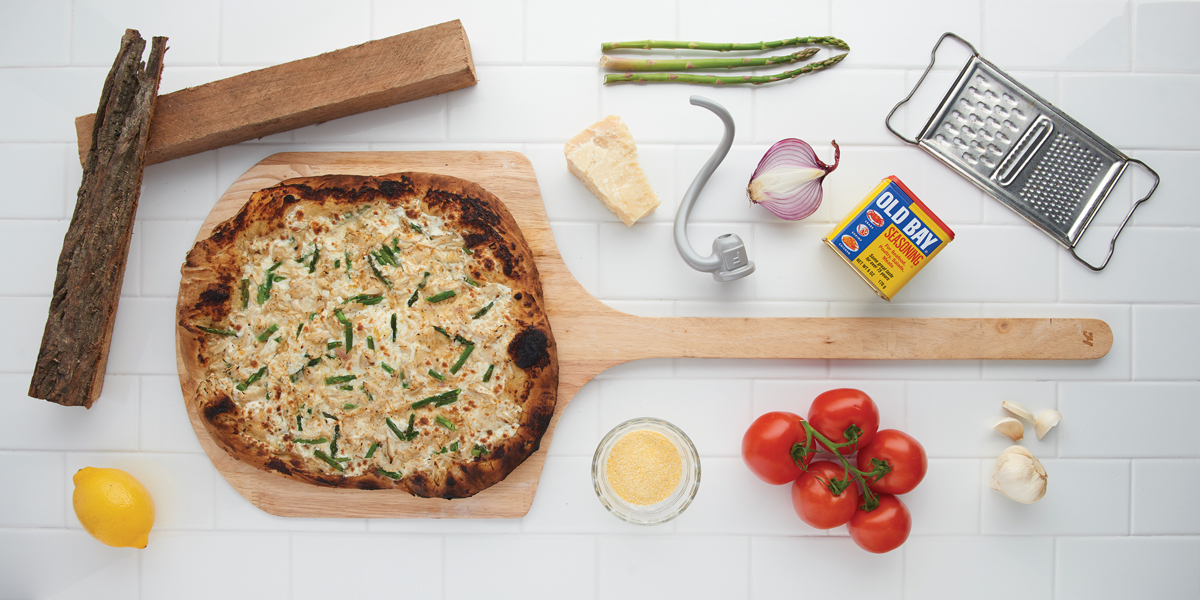
Eventually, Dogfish Head changed its off-season pizza night, and the ingredients for my favorite pie disappeared from their menu. However, as my passion for food has grown over the past few years, recreating that pizza stood at the top of my must-do list.
Unfortunately, I discovered the cost of installing a wood-fired oven was beyond my reach. Then, through the waves of heat, an oasis appeared in the distance: the charcoal-fueled kettle grill. Weber kettle grills have been an American staple since 1952 and remain largely unchanged. A basic Original Weber charcoal grill costs a smidgen under $100, even less if used, putting gas grills to utter shame on a cost basis. Furthermore, the hype surrounding Weber’s build quality is completely justified.
KettlePizza Oven
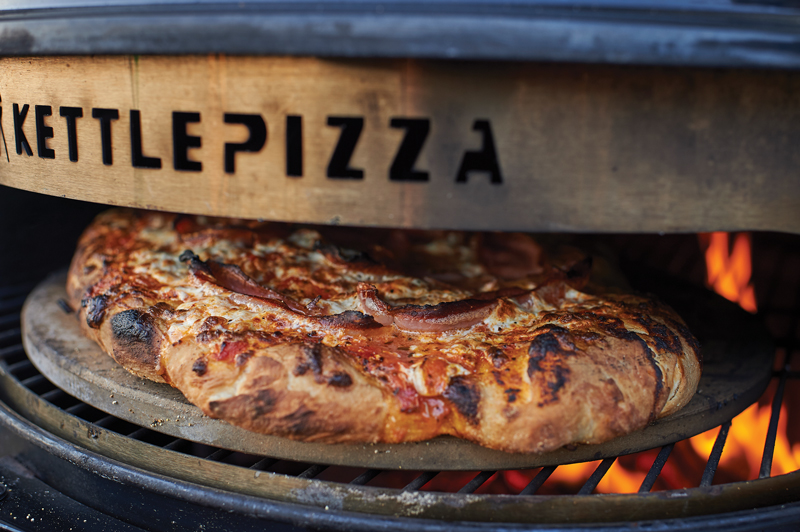
 So, you’re probably wondering how a seemingly limited charcoal grill can be of any use in baking a wood-fired pizza. A gadget call KettlePizza offers an ingenious solution: a stainless-steel insert that converts kettle-shaped charcoal grills into wood-fired pizza ovens.
Assembly is a snap. First, no tools are required, as it adjusts to fit 18.5 and 22.5-inch grills, plus 26.5-inch grills with an extension. The grill’s lid is placed on top of the KettlePizza, which has an opening for a pizza peel, allowing the heat to remain trapped in the dome. The next step is to remove the kettle grill’s top grate and place it inside the KettlePizza insert. This will raise it away from flames and into the hotter air. A pizza stone then rests on top of the grate, level with the grill’s edge and the opening in the KettlePizza. The result is easy access, superb heat retention and even heat distribution below the pizza.
For my “oven,” I started with a basic KettlePizza kit that included the insert, a metal peel and a pizza stone. The kit was added to an old stainless-steel Weber grill I restored; today, the model is known as the ‘Performer Deluxe.’ Brilliantly, the Performer Deluxe scorches charcoal’s Achilles heel – slow startups – with a propane burner to fire up rapidly. Dried hardwoods fully ignite in minutes, taking the oven from a cold start to 700 degrees in roughly 20 minutes.
KettlePizza carries a variant for propane grills, but that option misses out on the mouth-watering flavor added by a hardwood fire. Temperature-wise you will also be at the mercy of your grill’s BTU gods, which is more limiting than a hardwood fire.
Fire + Wood
 Hardwood selection is equally as fundamental to flavor as the quality of your ingredients since each variety produces uniquely smoky flavors, tantalizing aromas and varying burn rates. Apple, maple, hickory, pecan, oak, mesquite and cherry are popular hardwoods that can be mixed to create more elaborate profiles.
The Restaurant Store in Lancaster has been foundational to my setup, as it carries perfectly sized pieces of dried hickory specifically for cooking. (The moisture content of wood impacts the burn rate and temperature, so it needs to be dry.) My baseline for startups is half-a-dozen pieces of hickory.
When building the fire, it’s important to line the back edge of the oven with wood in a ‘c’ shape. It’s essential that heat from the fire be indirect to avoid burning your pie into an embarrassing crisp. Heat and temperature are two different things, but to keep it simple, the air above the pizza and below the stone will get plenty hot.
The KettlePizza and Weber lid both have built-in thermometers that help to monitor and utilize differing temperatures at the bottom and top of the oven. I’ve found that an infrared thermometer is more accurate and helps measure the temperature at various points on the pizza stone.
Baking Tools
A trip to the Restaurant Store will prove to be well worth your time in the pursuit of a better bake. For example, the store carries an assortment of wood peels and pans – in matched quantities and dimensions – to fit your pizza stone. A wire brush is useful for sweeping the stone clean between each bake and removing burnt food and corn meal that can leave a bitter taste. A pair of pizza turners, tools for rotating the pizza, can also be lifesavers, especially as you get started. I found my set online and mostly use them for tending the fire.
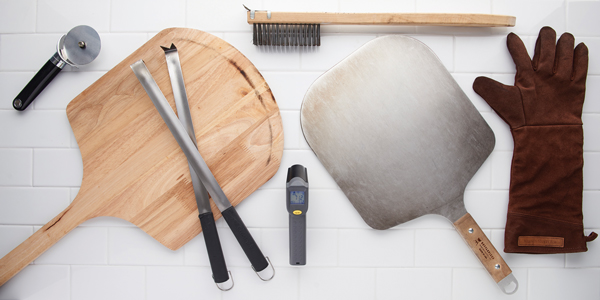
A thin aluminum peel is ideal for turning the pizza to even out any hot spots and for pulling a finished pizza out of the oven. Aluminum peels are easier to get under the pizza and can be used to crisp the top of the pizza by lifting it into the hottest air in the dome of the oven. Leather fireplace gloves can literally save your skin.
Dough
You probably already have most of the ingredients in your kitchen to make some of the best pizza dough you’ve never tasted. But, if you are going through the work of making wood-fired pizza at home, at a minimum you’ll want to upgrade your ingredients. I prefer bread flour (for a crispier crust) mixed with a high-gluten flour. However, all-purpose and 00 flours are fine. Two teaspoons each of salt and olive oil, one of sugar, and 2-1/4 teaspoons of activated yeast in 2-1/4 cups of water are all you need. Then, combine everything in a stand mixer, where it should climb up a dough hook and not be too sticky. Add more water or flour as needed.
 Once mixed, place the dough in a bowl thinly oiled with extra virgin olive oil. Let the covered dough proof rise at room temperature for a couple of hours prior to baking, or put it in the refrigerator for a couple of days in advance of baking if you prefer to let it ferment longer. Extra dough can be frozen.
If you want to save time or err on the side of caution, I’d recommend that you start out by using store-bought dough. The heartache of watching a day’s worth of work go up in smoke isn’t worth the risk. Buying dough from your grocer’s bakery or potentially from your local pizza shop can add consistent quality and time savings as you learn to create unique flavors and textures that are transformed by fire.
Sauce
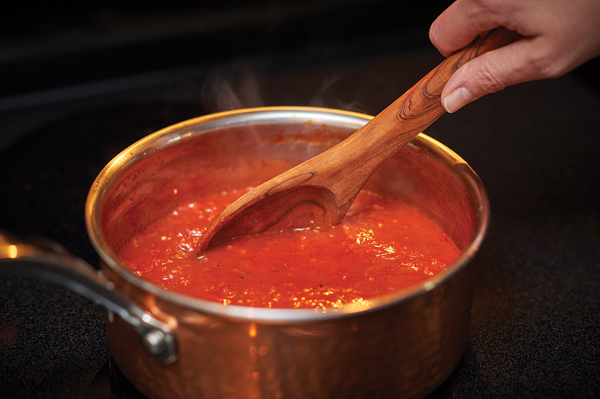 Similar to making the dough, producing an excellent tomato sauce from scratch is quite easy. Four tablespoons of olive oil, four garlic cloves, and a teaspoon each of basil and parsley, are sizzled in a saucepan before crushed local or canned peeled tomatoes are added and cooked over medium heat for 10 minutes total. Add salt and pepper to taste, and that’s it.
Making an Alfredo sauce from scratch is a little more involved, but the richness of flavor will be your reward.
Again, canned sauces are great timesavers and good insurance policies for starters, but making your own will give you something to do as the dough rises. Better yet, the aromas that will flood your kitchen are well worth the process.
Pizza Assembly
 I start each pizza on a wood peel that’s been dusted with flour and cornmeal to help absorb moisture. For convenience, I recommend you have one peel for each pizza of the bake. Letting sticky dough rest too long on a peel is a near guarantee that it will permanently stick at the precise moment you hope to gently slide a pizza into a heated oven. The pizza should slide freely on the peel; if it sticks, add more cornmeal and flour generously underneath. I usually form the shape of the dough by hand then roll it out for a thinner crust before brushing olive oil on the crust.
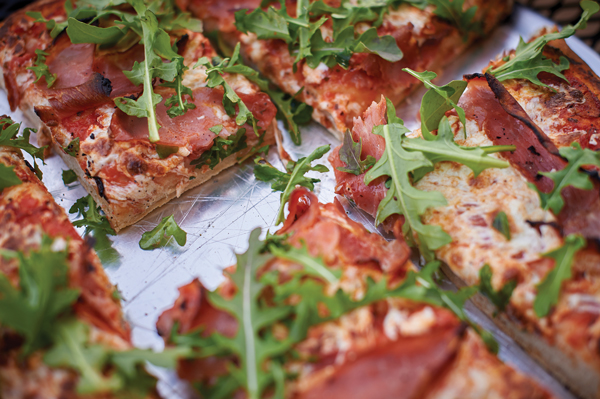
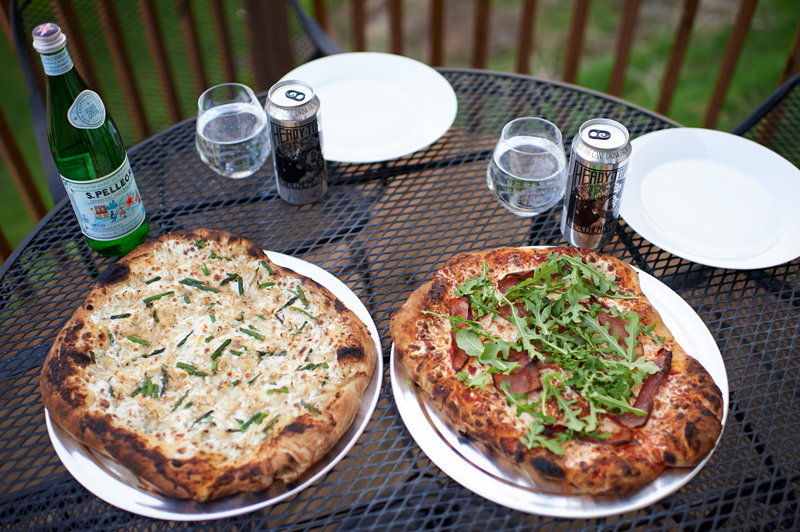
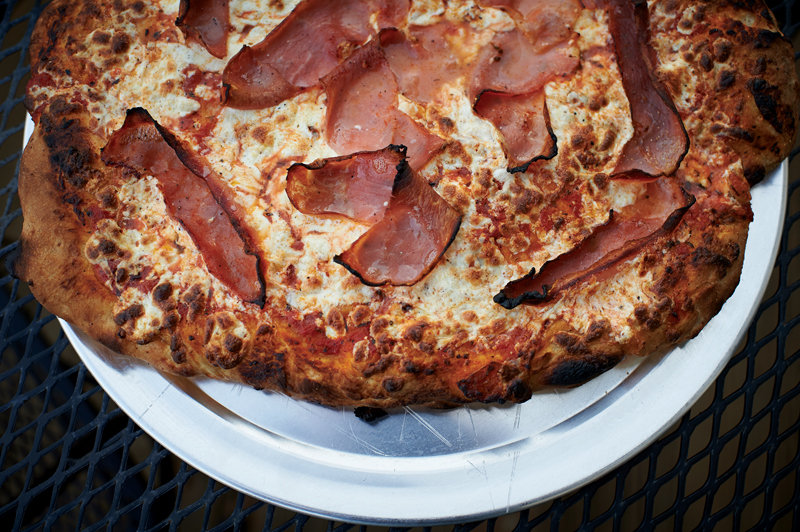
Smaller pizzas are wonderful in that they allow for individual preferences. From fresh and cured meats to asparagus, peppers, mushrooms, apples, arugula, and even Maryland lump crab, the list of superb local ingredients and creative possibilities is endless.
The Bake
Once the pizza stone hits approximately 550-600 degrees F, I’ll shuffle a pizza off of the wood peel. At those temperatures, a pizza will bake in a matter of a few minutes, so stay near the oven, and knock on wood, it would behoove any baker to keep a fire extinguisher on hand for safety. Once on the hot pizza stone, the dough begins to bake instantaneously. It will almost immediately rise, and the edges of the crust will start to curl under ever so slightly, a sign the pizza has started to release from the stone.
Use an aluminum peel to carefully lift the front of the pizza to see if it has released before you rotate it 90-180 degrees for an even bake. If the pizza starts to burn, the temperature is too hot, and the proximity or quantity of heat needs to be reduced.
Savor
Once out of the oven, you won’t believe this slice of Italy was made in your own backyard. Cut, serve and share – along with your favorite glass of red wine or craft beer. If you decide you need more pizza, the fire will easily stoke for another round.
Hopefully, this leaves you inspired to try baking your own pizza. Six months after experimenting with the KettlePizza, I must say it’s been the most challenging and rewarding fun I’ve had cooking. Not surprisingly, it’s also the food event we’ve shared with the greatest number of friends.
Recipes & Resources
KettlePizza Website: kettlepizza.com
Dough Recipe: Bobby Flay ‘s Pizza Dough Recipe, foodnetwork.com.
Margherita Sauce Recipe: Tyler Florence’s Margherita Pizza Recipe, foodnetwork.com.
Alfredo Sauce Recipe: allrecipes.com
Leave a Reply